Recently my oldest friend (since kindergarten!) had a baby shower for her first baby! I wanted to give her something cute for her little girl and add a special touch to show her how much she means to me. I love the sentiment and meaning that comes with sharing my time, thoughts, creativity, and love to create something special that fits my loved ones’ lifestyle, decor, and personality. In this case, I found out the color scheme of her baby girl’s room and added a few special touches to give the already cute picture frame a DIY photo frame makeover.
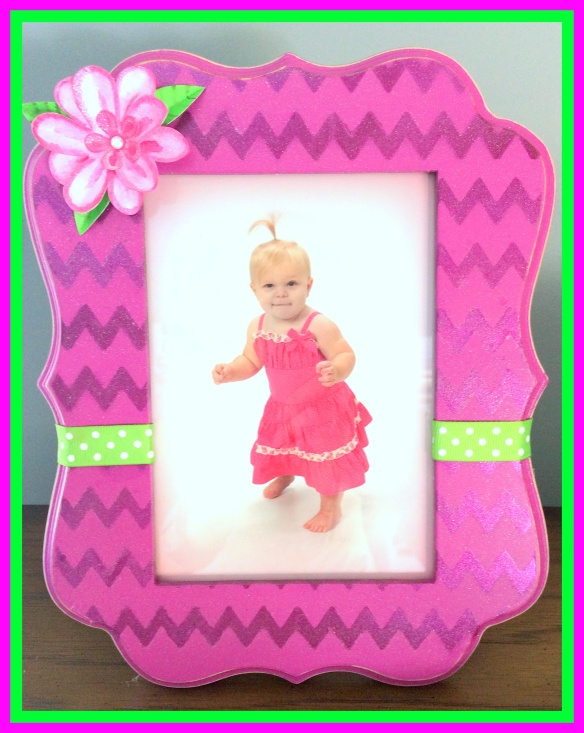
This is the sweet frame I found at Hobby Lobby as a beginning place for this project!
 Other supplies needed:
 Other supplies needed:
- Pink Glitter Spray Paint
- Chevron stencil
- Green Ribbon
- Paper Flower(similar ones can be found at craft stores or on Amazon.com)
- Painter’s Tape
- Hot Glue Gun and Stick
- Damp Paper Towel
How to make the DIY Photo Frame:
- To keep the spray paint off of the sides, wrap the edges carefully with painter’s tape.
- Put a very light coat of glue from a glue stick on the back of the stencil. I used my finger to spread it on.
- Place stencil on top of the frame (making sure to have already removed the glass and stand) and press it down firmly to secure the stencil to the frame front.
- Spray lightly with the Pink Glitter Spray paint and let dry. Remove stencil.
- Use the damp paper towel and wipe off any glue residue.
- Use hot glue to secure the ribbon in place on the back of the frame.
- Hot glue the flower into place.
If you enjoyed this post, you may also like:
Origami Surprise from the Tooth Fairy
Happy Crafting!!
