Easter is this weekend, so last weekend my kids and I decorated the house, dyed the eggs and did a little Easter crafting. Blooming Easter Eggs was a quick one we put together with some things we already had and a couple of inexpensive items from the Easter aisle at Wal-Mart. My favorite part about doing this craft and all of our picture crafts is knowing the delayed gratification will come year after year! I love being able to pull out picture crafts of my kids from different holidays not only to remember how cute their past pictures are but also to reminisce about the time we spent bonding while doing them! For more Easter ideas, check out this link from past projects! http://pictureperfectmom.com/?s=easter&submit=Search

What you need:
- Exchange or Wallet size school pictures
- Small flower pot, bucket or basket
- Floral foam that fits inside above container
- Egg shaped stencil or thick paper to create egg pattern to trace
- Pencil
- Scissors
- Large Egg Confetti ($.98 at Wal-Mart)
- Green and White paper straws ($.98 at Wal-Mart)
- Ribbon
- Easter Grass
- Craft Glue
- Small binder clips (optional)

1. Use the stencil or pattern to trace egg shapes and cut them out. 2. Glue the picture on the front side of the large confetti eggs. The front side of the confetti I found has glitter on it. For steps 2 and 3 make sure the glitter faces outward. You will to hold the picture to the egg for a minute or two for the glue to adhere to the glitter.
3. Place a ring of glue around the edge of the inside of the confetti egg and a line of glue half way up the middle starting at the bottom of the egg. Place the straw on the line of glue and place the confetti with the picture on the top.
4. This is what your blooming egg will look like when assembled. You will have to hold each one for the glue to dry around the straw and on the edges. As I got going, I found that small binder clips were very helpful to hold each one together while drying. 5. While glue is drying place floral foam inside of the pot or basket and make sure it fits snugly.
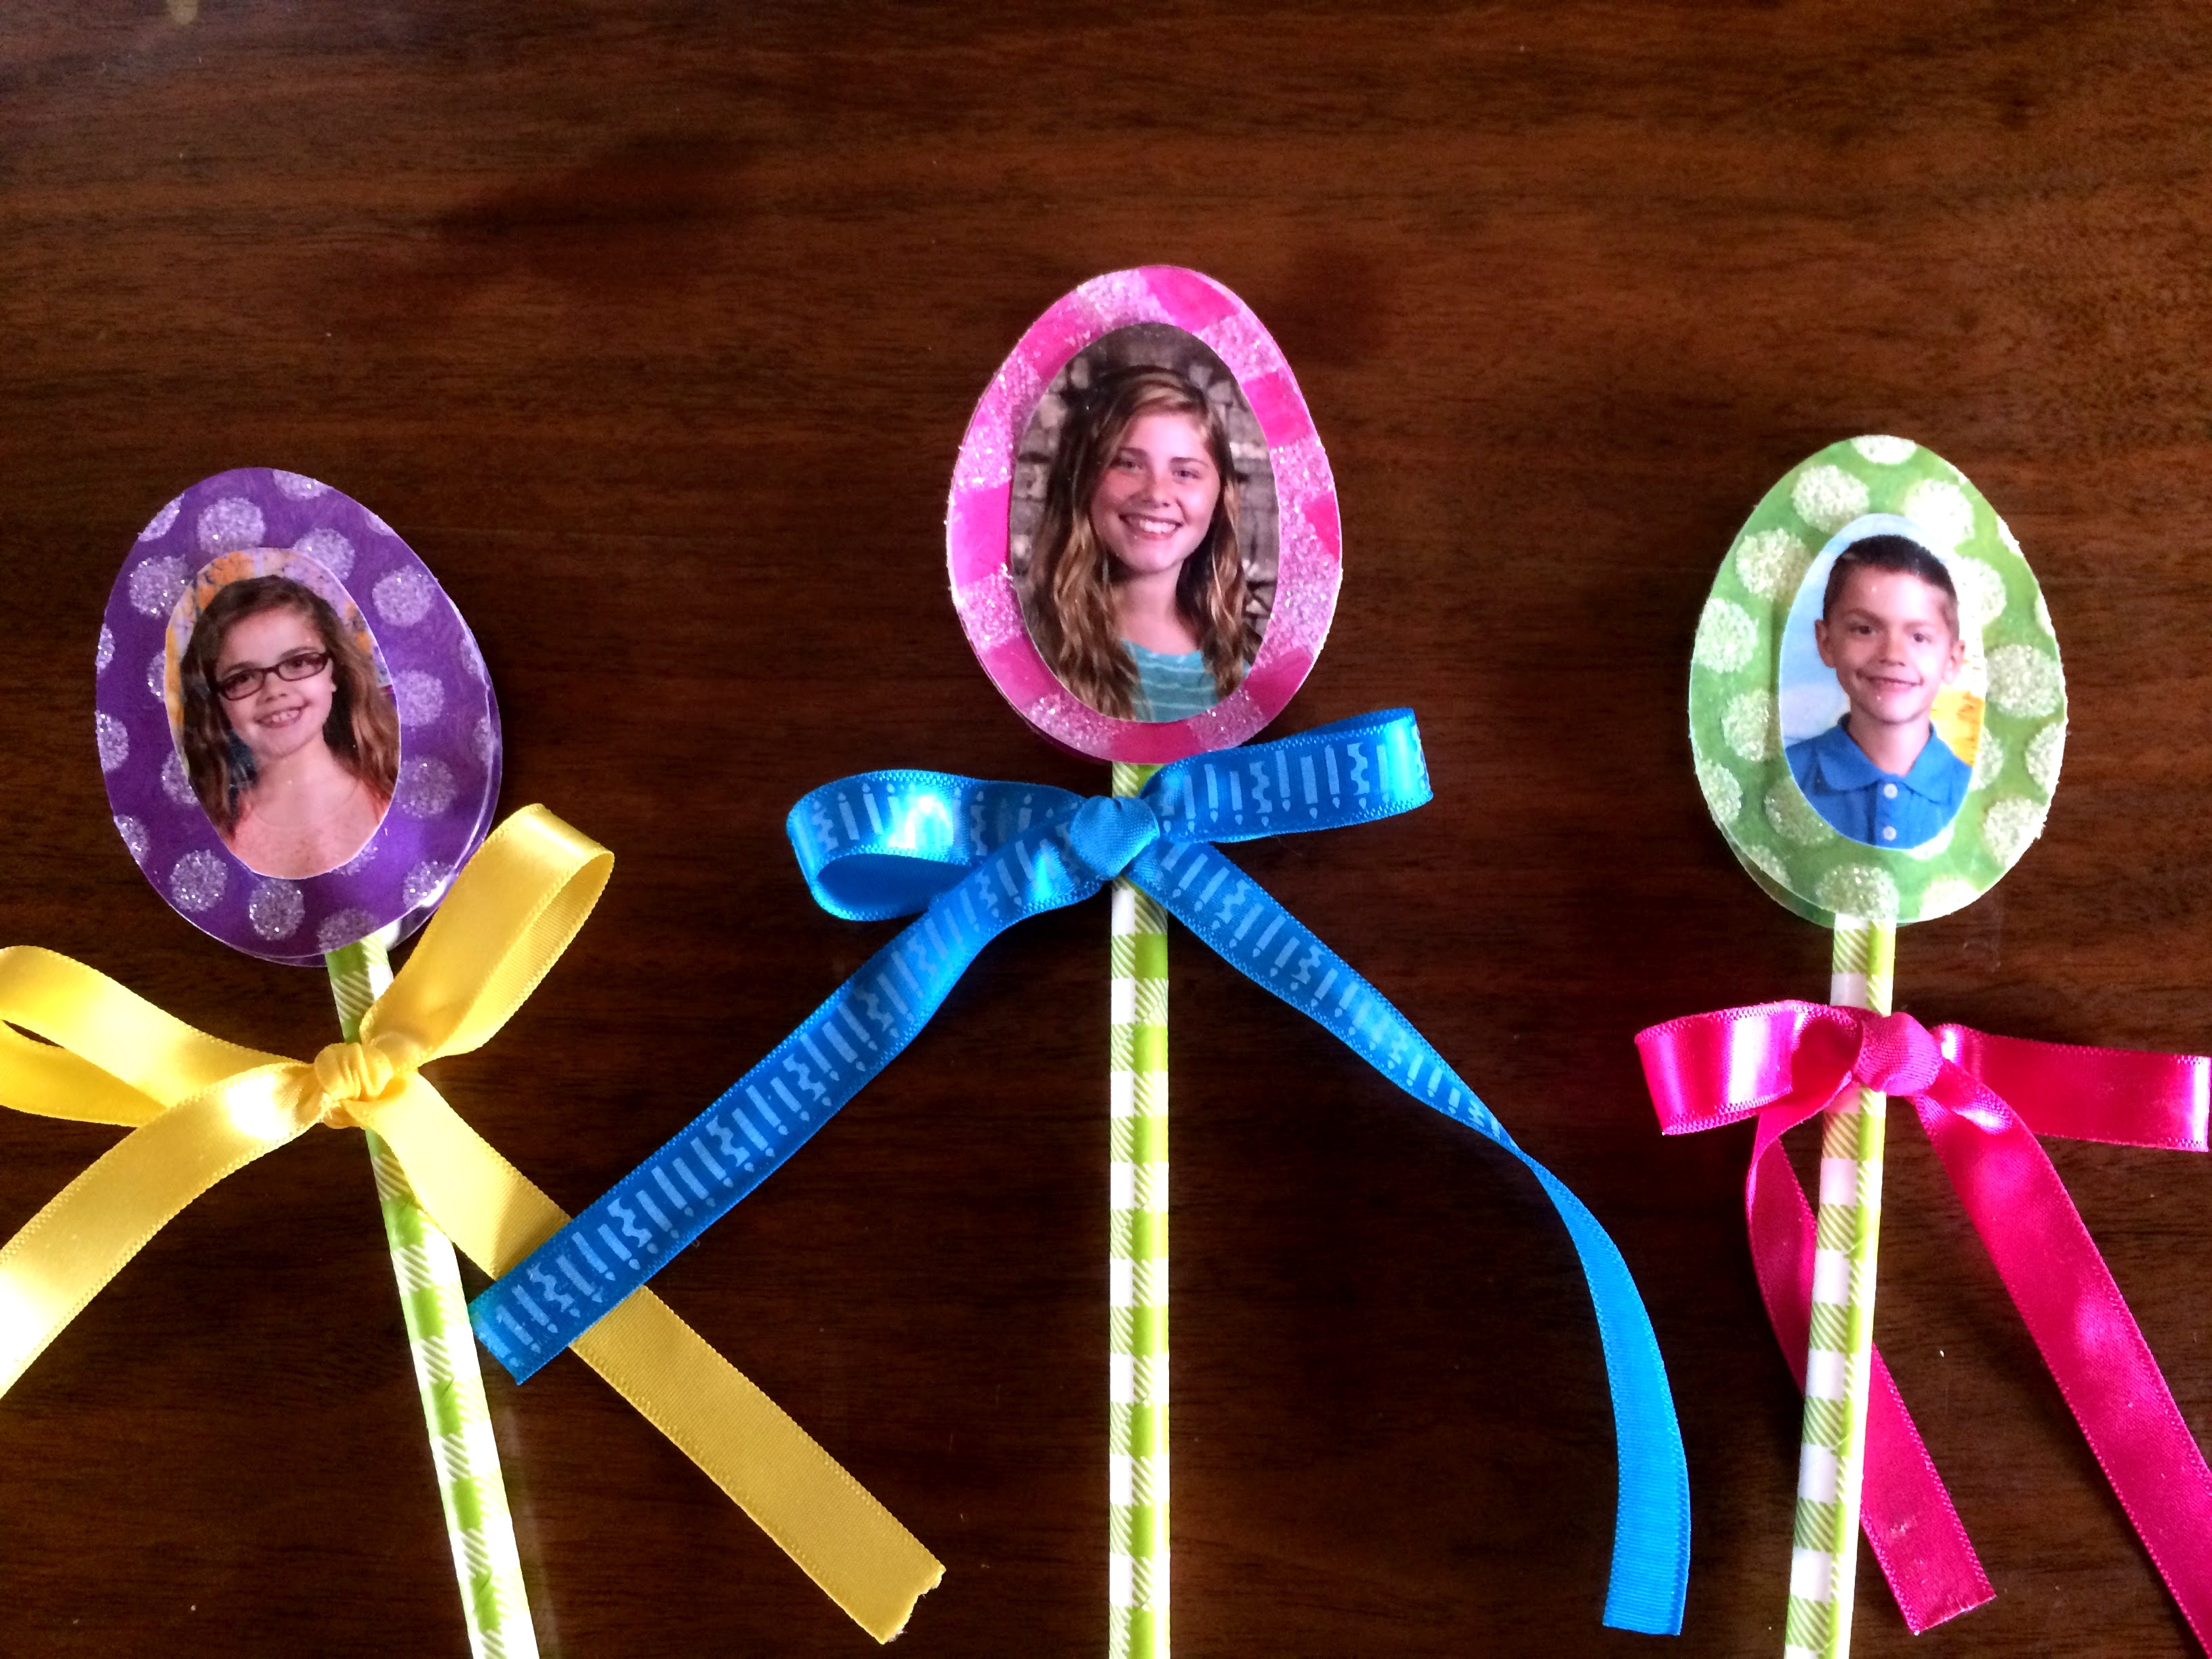 6. After all glue is dry, tie a colorful ribbon around each of the stems (straws) for an added touch.
7. Slide each stem into the floral foam and embellish with Easter grass. For a little something more, consider adding dyed eggs for extra Easter flare!
Happy Easter!!
